The data on your server should always have a backup as the chances of data loss is higher when you are working on the maintenance of the server or sometimes other faults on the server may cause a data loss. The backup will help to restore your valuable data efficiently and support your server in decreasing downtime and protect you from permanent data loss
Here we can discuss the configuration of backup on the Cpanel server, the Cpanel server offers the backup on a daily and weekly basis, and it also provides the feature to save your backup to a remote server and local server.
What is cPanel/WHM?
Its world’s one of the most used control panels which offer plenty of features that can be performed through a graphical interface and any beginner can handle it very easily.
Here are the cPanel backup configuration steps in detail
- Login to your WHM.
- Select the backup configuration option on WHM
- On the backup status option select “Enable Backups” to enable the backup
- Scroll down to the “Global” Settings option
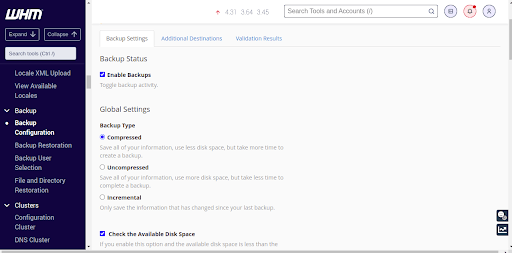
You have 3 options there
- Compressed: With the compressed option, you can back up the data in compressed size. It will take more time to create a backup than the uncompressed form. It is preferred for servers with lower disk sizes.
- Uncompressed: It will create a backup of the same size as the original data. It is faster and consumes more disk space. And restoring data from the uncompressed backup can be done easily
- Incremental: The incremental backup help to backup the data that has changed since your last backup.
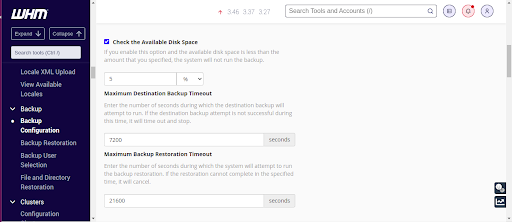
Check the available disk space option
If you select the available disk space option the system won’t run an automatic backup if the server space is below the mentioned space.
Maximum destination backup timeout and Maximum backup restoration time out will help you to set a maximum time limit to backup or restore, If it won’t end in a limited time the backup process will complete automatically.
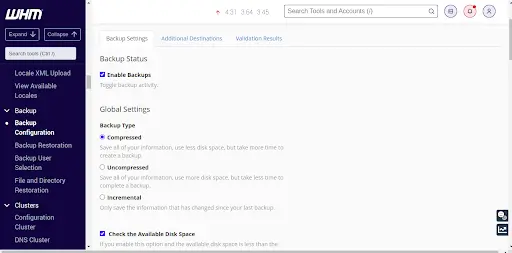
Scheduling and Retention
This option helps you to select the daily, weekly, or monthly backup option as your wish,and here you can add the number of backups you wish to keep at a time.
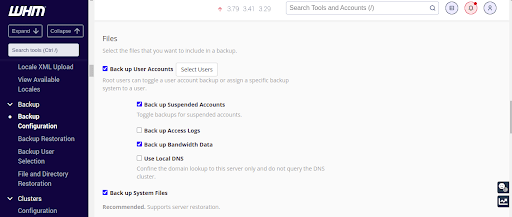
Files
Here you can select the file you need to backup
- Back up User Accounts: You can instruct cPanel to select a user account to backup
- Back up Suspended Accounts: Here you can select the option if you need to back up the suspended account.
- Back up Access Logs, Back up Bandwidth Data, Use Local DNS, Back up System Files: You can select the three options as you wish to add the mentioned to the backup
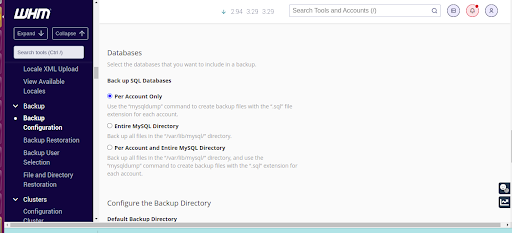 Select the Databases option to
Per Account Only – will help your database backup in .sql format as it runs “mysqldump” command to create a backup
Entire MySQL Directory –This will backup the entire MySQL directory (var/lib/Mysql)
Per Account and Entire MySQL Directory-This option will backup the entire MySQL directory and each account with the “mysqldump” command.
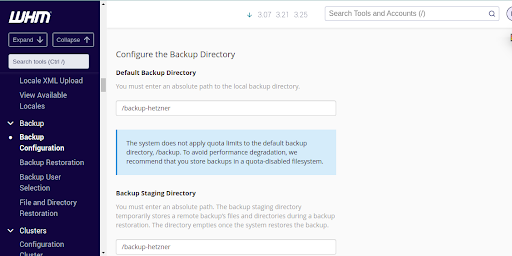
Finally, Configure the Backup Directory
Here you have to select the Default Backup Directory & Backup Staging Directory
Where Default Backup Directory is used to store the local backup and Backup Staging Directory temporarily stores the remote backup’s file and directories during a remote backup restoration. This directory empties once the restoration is completed.
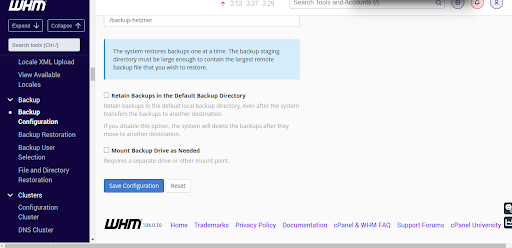
Select the Retain Backups in the Default Backup Directory if you wish to retain backup in the default backup directory even after uploading to the remote directory
Mount Backup Drive as Needed You can select this if you wish to mount backup to a separate drive
Finally, Save Configuration and your backup are all set.