An SSL certificate on your site gives you the padlock icon in your browser, and this encrypts communications between visitors to your site and the server. Google is now giving sites without SSL certificates a warning in the browser so it is more important than ever to have an SSL certificate on your site.
All sites/domains hosted by Zalvis are automatically enrolled in the Auto SSL system – this is included free of charge with all hosting packages on Zalvis. This means that as long as the domain points to us (via the nameservers or A record) the system will request an SSL for the domain and install it automatically if it doesn’t already have one.
This process is transparent and requires no intervention from you. Generally speaking, it takes 4 hours after pointing the nameservers for the SSL to be requested and installed, but, if it takes longer than this or if your SSL certificate is not working, please let us know. or try the following steps below
- Login to cPanel
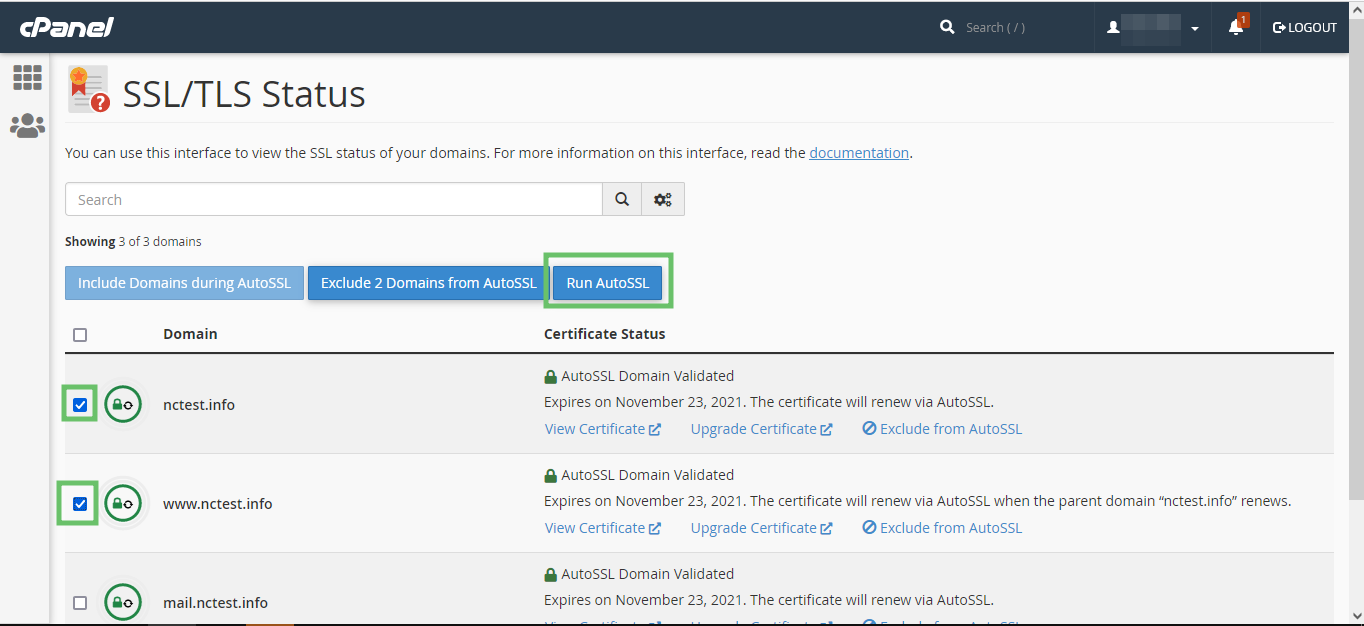
- Go to the “SSL/TLS Status” section in cPanel.

There you will see the list of all the domains and subdomains in cPanel along with their SSL certificates.
- You can select the domains in the list and click “Run AutoSSL” to force AutoSSL installation for them.

To force your site to work over SSL, generally speaking, you can use a rewrite rule or go to domain and force SSL, e.g.
RewriteEngine On
RewriteCond %{HTTPS} off
RewriteRule ^(.*)$ https://%{HTTP_HOST}%{REQUEST_URI} [L,R=301]
This will redirect all requests for http:// to https:// but it is important that you only do this after your SSL is installed and working.


If you’re running a CMS like WordPress, it is also important to set the Site URL and Homepage in the wp-admin area to include the https://. This is important so that images and stylesheets and so on are loaded over https:// as well. You can also install a plugin such as Really Simple SSL that can help you set these redirections automatically.