Sometimes, speed and connectivity problems can be related to latency or a ‘bad hop’ on the route to the server to which you are connecting, or the site you’re attempting to visit. There are a number of ways to determine what the cause of this is, but one great place to start is
An MTR test is a diagnostic tool that can help identify where connections on the internet are failing and may identify what’s causing your connection to fail. Please ensure you run the test while using the specific network that is having an issue.
How To Perform An MTR On Windows
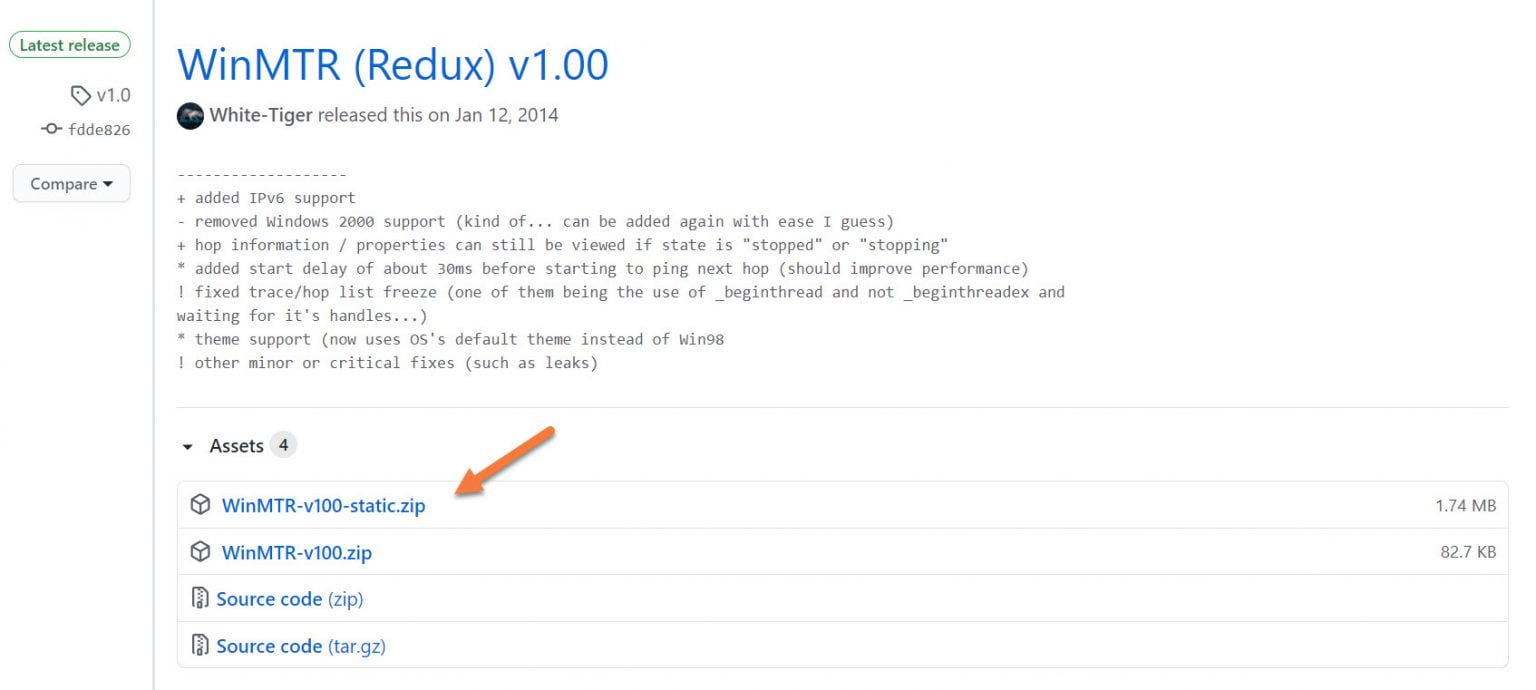
Step 1: Download WinMTR. If you Google WinMTR download, there are a lot of sites that have the file, but some may be sketchy or give you malware. To prevent that, you can click this link to open a safe place to download the latest build of WinMTR.
On that page, you’ll want to download the file that ends in ‘static’. The version may change, but the static one is the one you want. See below:
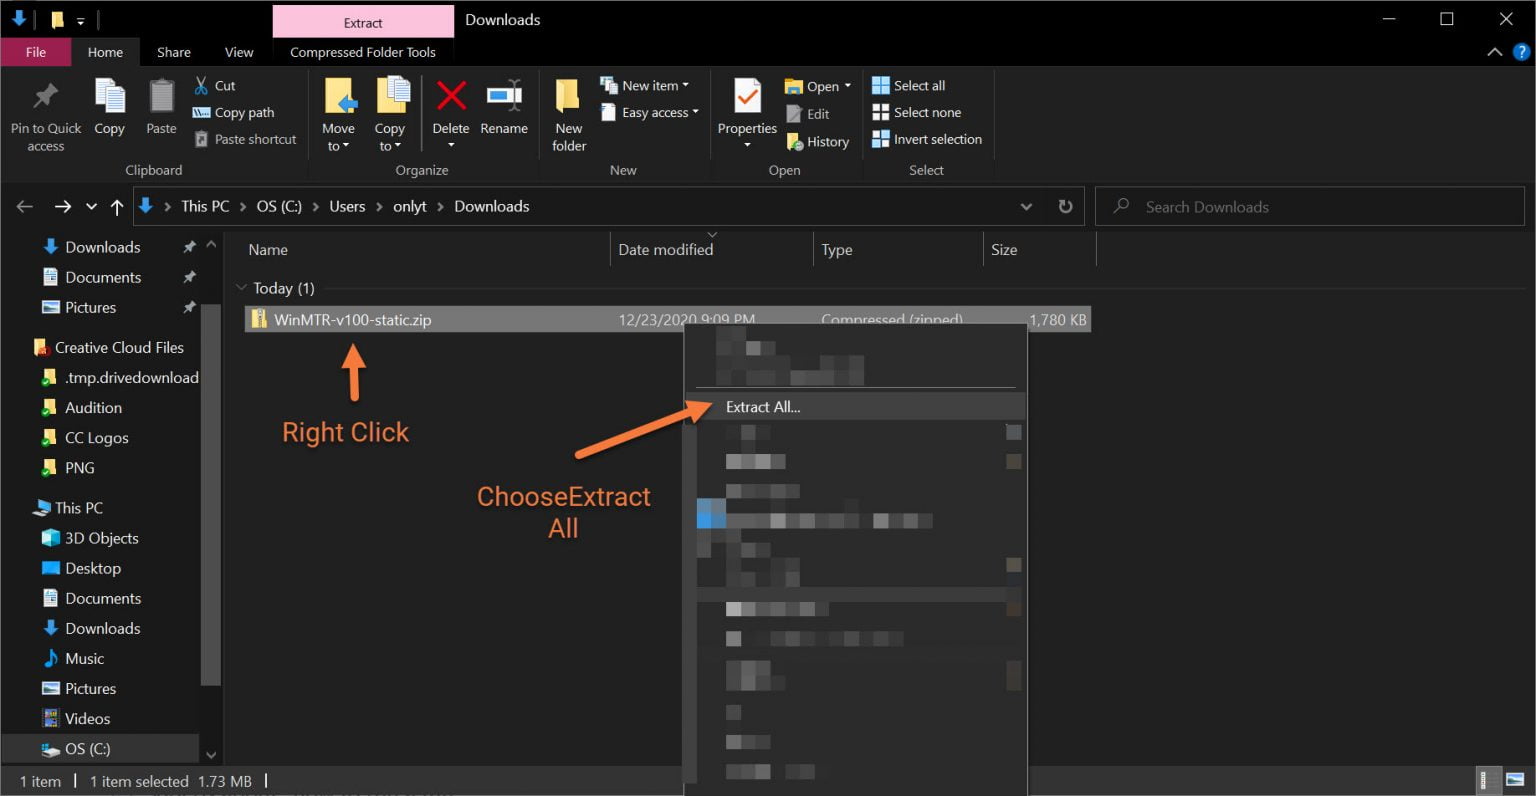
After the file downloads, navigate to the folder where it was saved and unzip the file.
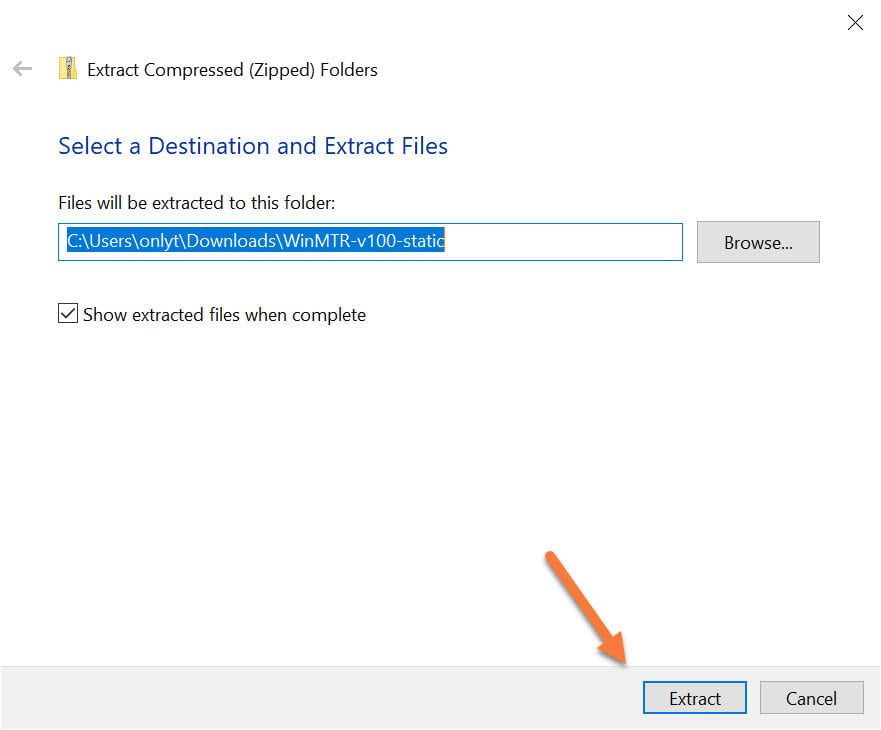
Next, click “Extract” to extract the files into the same folder where the WinMTR ZIP was saved.
After extracting the files, a new window will open with the files.
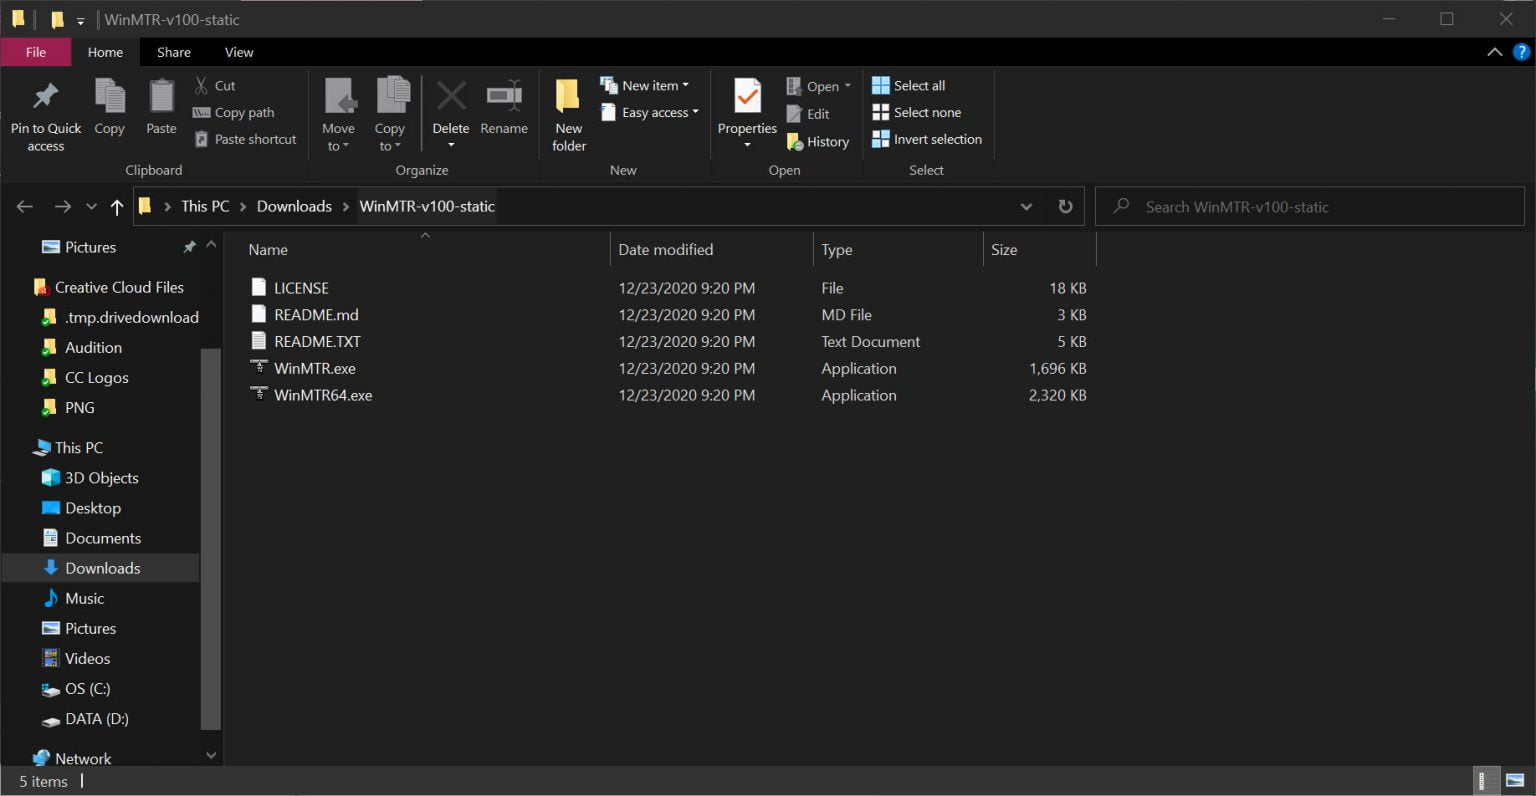
Double click WinMTR64.exe to open the application.
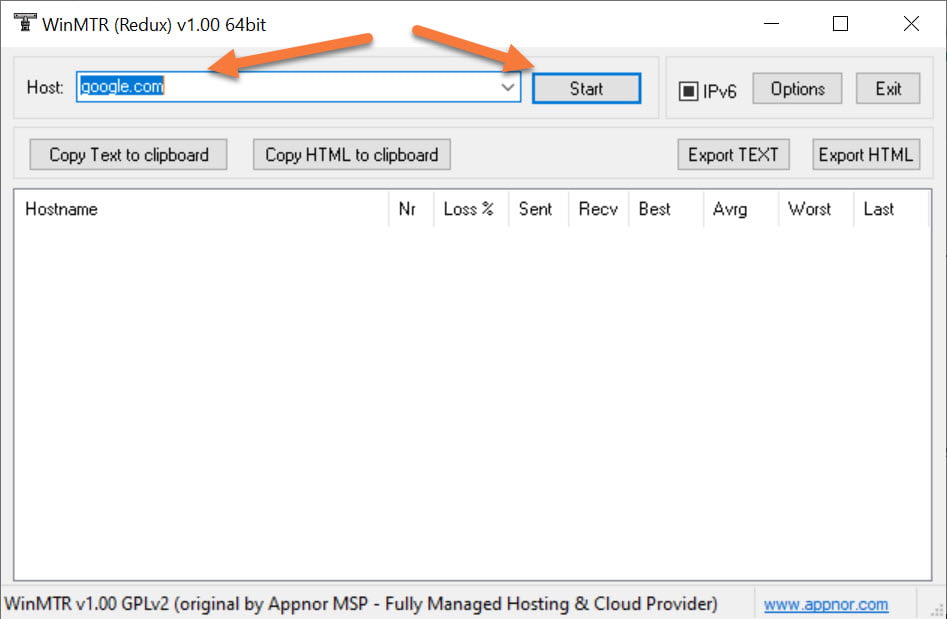
Step 2: Run your MTR Test. To do this, enter a domain name or IP address in the host box, then click Start.
Step 3: It’s best to let an MTR test run for about 15 minutes or so to accrue a good dataset.
Once you’re ready to stop the test, click Stop.
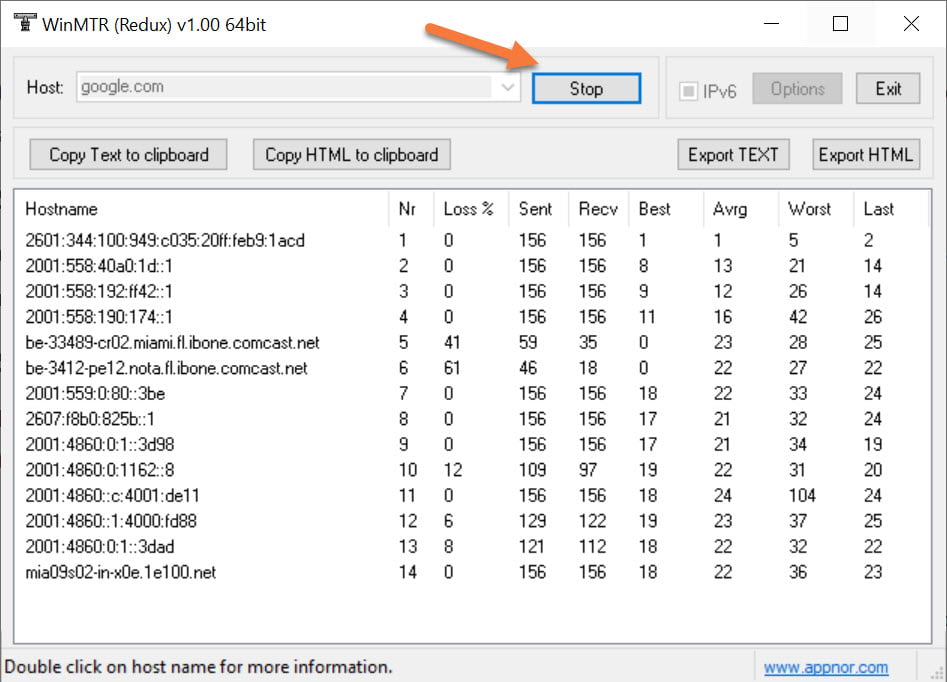
Now you can see the results of your MTR Test.
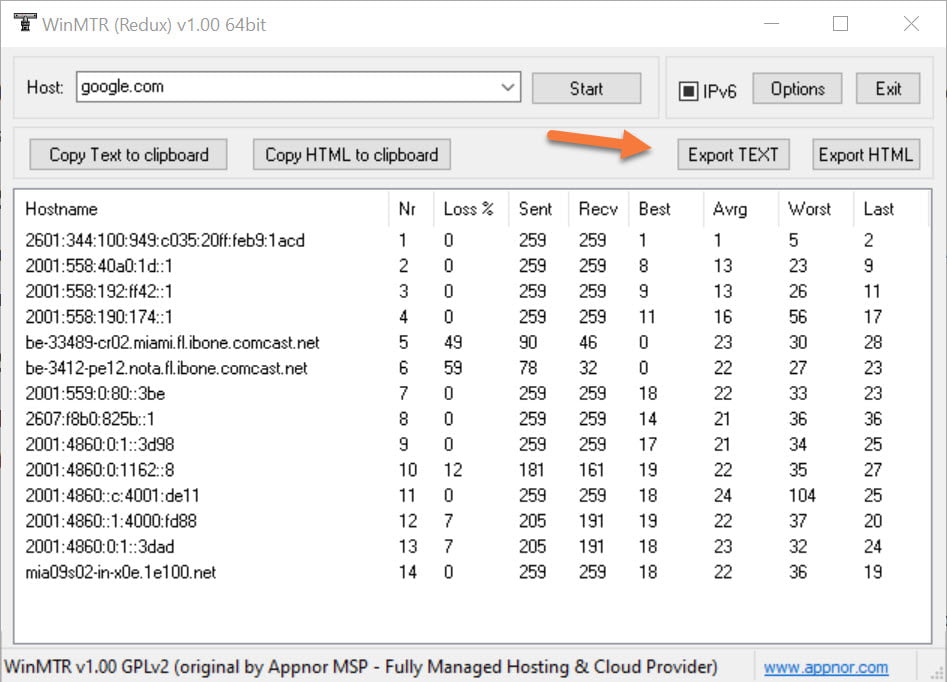
Step 4: It’s more than likely that our team asked you to run this test and are awaiting an export of the results. To do this, click Export Text. (Yes, you can export as HTML but TXT files are much smaller and easier to work with via attachments).
After clicking export, you’ll be given the option to name the file. You can give it any name you want at this point.
That’s it! Now you have created an MTR report on Windows, exported it as a TXT file, and are able to send us the file for examination.
How To Perform An MTR On Linux
Installing MTR on Linux is pretty easy. You’ll just need to use the terminal to download the package from it’s repository and install.
If you’re running a RHEL based distrol, such as CentOS, Fedora, or RHEL, open your terminal and enter:
yum install mtr
After it’s been installed, enter this command to run the test:
mtr google.com -c 1000 -r
Then press return.
Note, if your user on the Linux system does not have sufficient permissions, you can use the command below. You’ll need to enter your root or admin user password to run this, however.
sudo yum install mtr
If you’re running a Debian based distro, like Ubuntu, use the instructions below:
Open your terminal and enter:
apt-get install mtr
Note, if your user on the Linux system does not have sufficient permissions, you can use the command below. You’ll need to enter your root or admin user password to run this, however.
sudo apt-get install mtr
After it’s been installed, enter this command to run the test:
mtr google.com -c -1000 -r
Since the MTR text runs in a terminal, you can select the text in the terminal, right-click on it, select copy, then paste the results in a ticket to our support team, should you have been requested to run an MTR Test.
How To Perform An MTR On MacOS
The MTR tool is not pre-installed on Mac OS X devices and is unavailable in the Apple store. To install MTR, you will need to have the Homebrew package management system installed on your computer. Homebrew makes libraries and utilities available for your Mac that are not included in the Mac OS X installation by default.
Step 1) Install Homebrew (if not already installed). Open the Terminal and run the following command to install Homebrew:
/bin/bash -c "$(curl -fsSL https://raw.githubusercontent.com/Homebrew/install/HEAD/install.sh)"
Follow the prompts to complete the installation.
Step 2) Install MTR: Once Homebrew is installed, you can use it to install MTR. In the Terminal, run the following command:
brew install mtr
This command downloads and installs MTR on your macOS.
Step 3) Run MTR: After installation, you might need to run MTR with sudo privileges because it requires raw socket access, which is restricted to root by default. To start an MTR to a specific destination (e.g., example.com), use the following command in the Terminal:
sudo mtr example.com
Replace example.com with the actual domain name or IP address you want to diagnose.
Let the MTR trace run for 10-15 minutes. Since the MTR text runs in a terminal, you can select the text in the terminal, right-click on it, select copy (or Press Command-C to copy), then paste the results in a ticket to our support team, should you have been requested to run an MTR Test. Use your mouse to highlight the traces results.
Step 5) Interpret the Output: MTR will start displaying the diagnostic information, which includes the route packets take to the destination and the response time for each hop. The output updates in real-time, showing statistics like packet loss and average latency.
- The leftmost column shows the hop number.
- The next column shows the IP address and sometimes the hostname of the hop.
- Following columns show statistics such as packet loss percentage, average round trip time (RTT), and more.Stop MTR: To stop MTR, simply press Ctrl + C in the Terminal. This will halt the program and give you a final report based on the collected data.
And that’s it! Now you know how to run an MTR test and send our Support team the results!
We hope you enjoyed this tutorial!