Telnet is a network protocol and a telnet client application allows you to connect to servers using Telnet protocol. Telnet is mainly used for remotely managing some devices, like network hardware. Telnet was designed to be used via a command-line interface.
This Knowledgebase article will cover how to use Telnet.
How To Use Telnet
Telnet is integrated into Windows 10 system, however, it is disabled by default. To install Telnet, follow the instructions below.
How To Enable Telnet On Windows 10 From The Control Panel
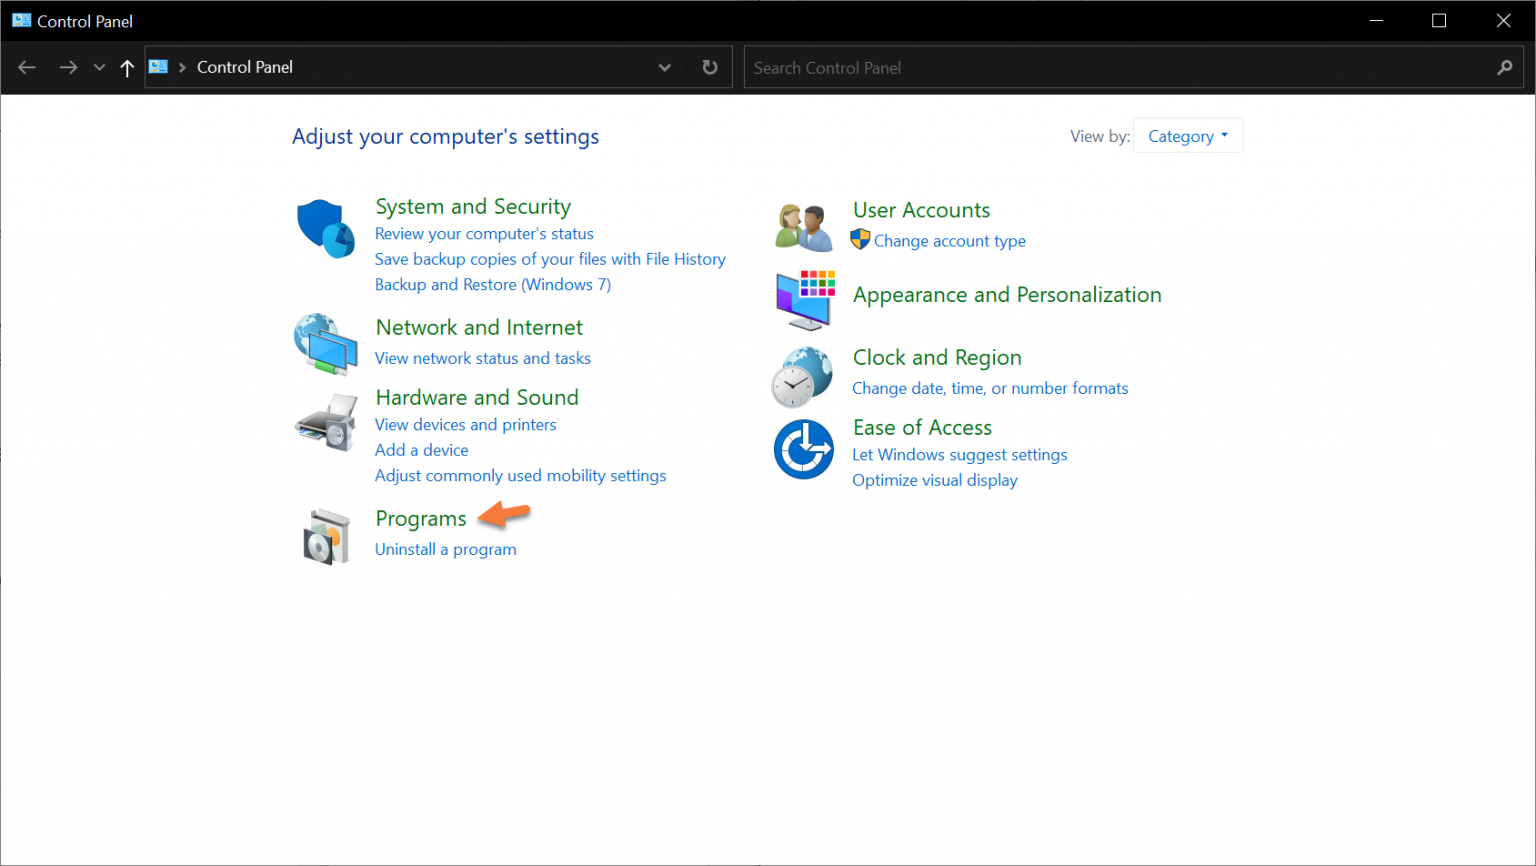
Open the Control Panel in Windows 10. You can press Windows key + R, type control panel, and press return, to quickly open the control panel.
 Next, click Programs.
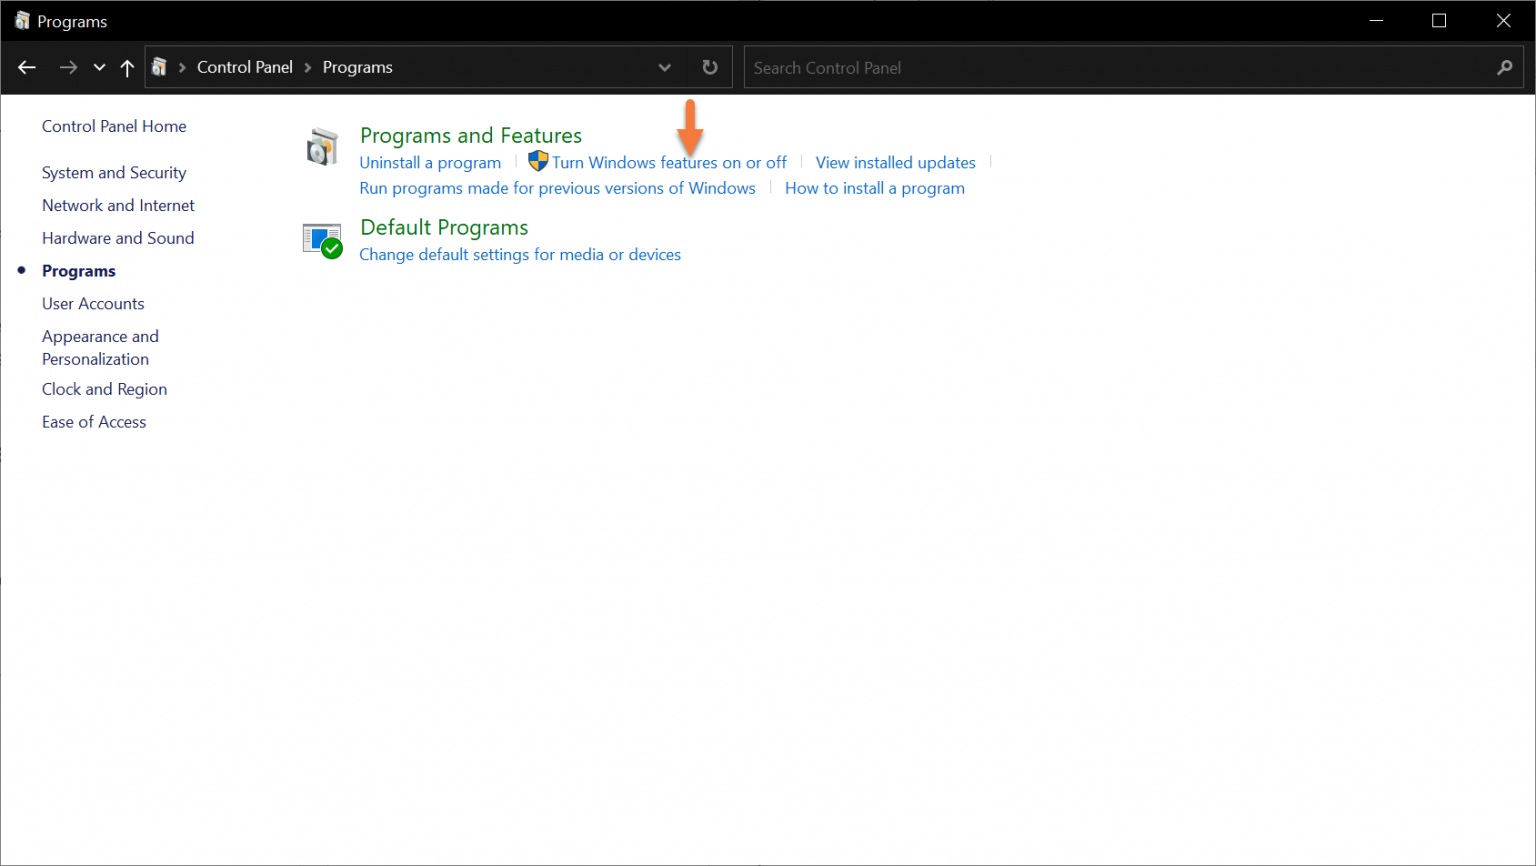
 After this, click Turn Windows features on or off beneath Programs and Features.
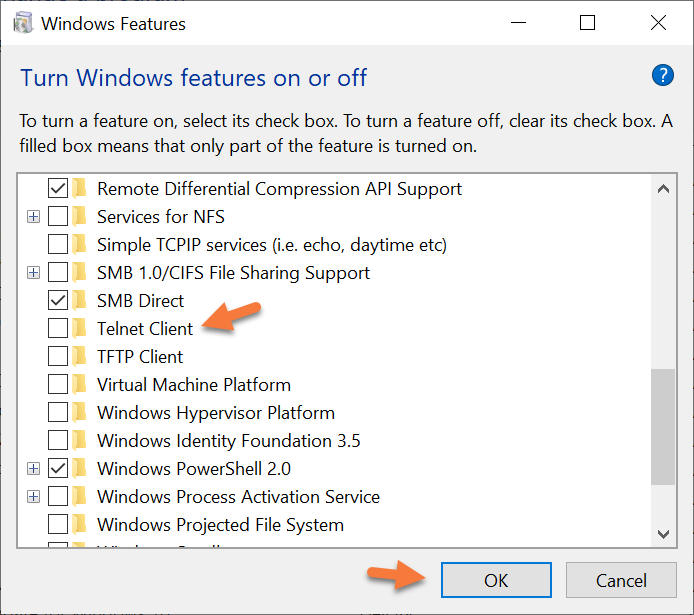
 In the dialog window which opens, scroll down and look for Telnet Client. Check the box to the left of the option, then click the Ok button.
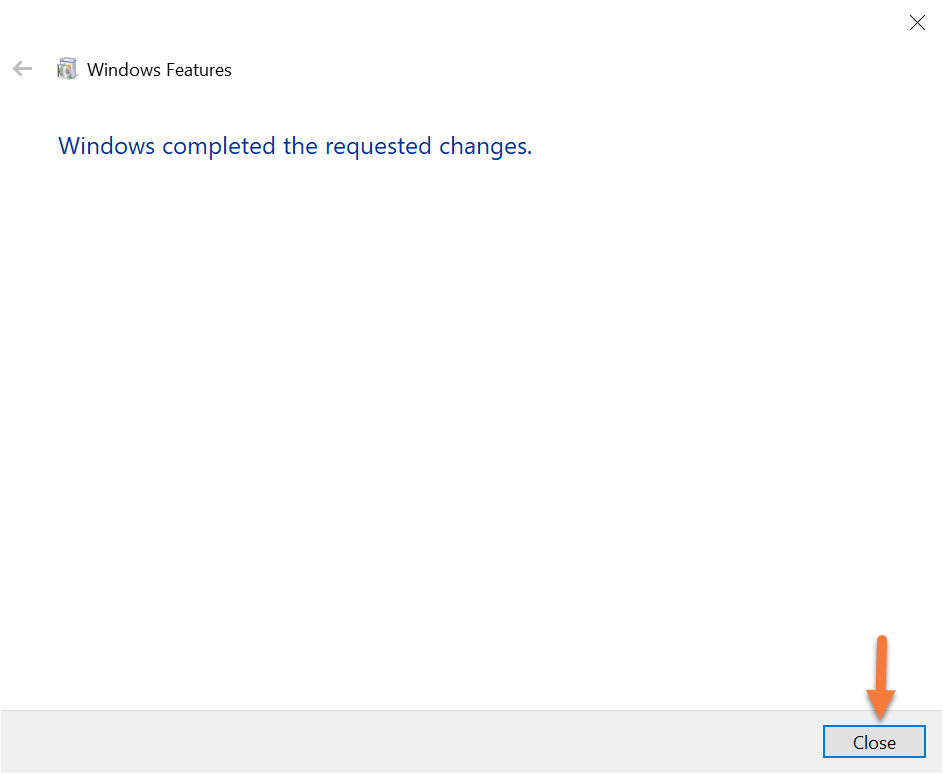
Windows will install the Telnet Client and you will see a window open while that takes place.
Click Okay when it’s finished.
How To Enable Telnet On Windows 10 Via CMD Or PowerShell
You can also install Telnet via the PowerShell or Command Prompt.
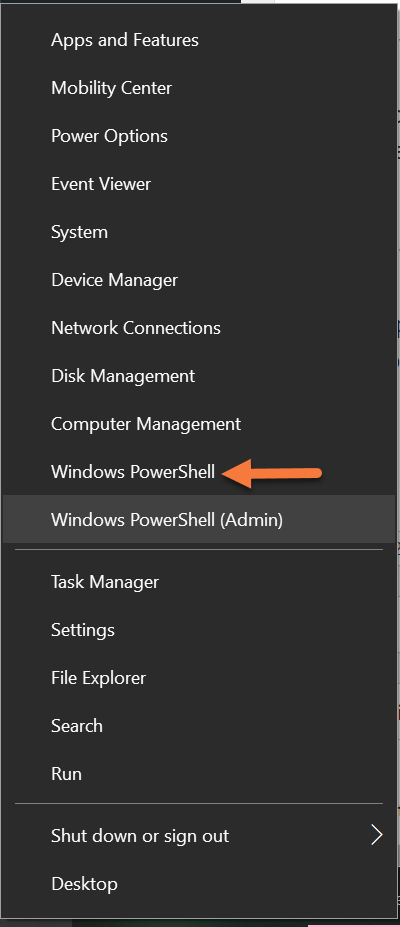
Step 1: Open an Elevated Command prompt. To do this, right-click the Start Menu and select Command Prompt (Admin) or PowerShell (Admin).
Step 2: Next, type this command into the Command Prompt or PowerShell:
dsim /online /Enable-Feature/FeatureName:TelnetClient
and press Enter to enable Windows 10.
Telnet will be installed.
How To Enable Telnet On MacOS Or Linux
Good news! Telnet is included with MacOS by default. Most Linux installations also include a Telnet client.
How To Use Telnet On Windows 10
Step 1: Right-click the Start menu and choose Command Prompt or Windows Powershell, depending on your configuration.
Step 2: When the command prompt, or PowerShell loads, type the following command:
telnet domain.tld port-number
For example, if you are going to use Telnet to connect to an SMTP server on port 25, you would use the following syntax:
telnet zalvis.com 25
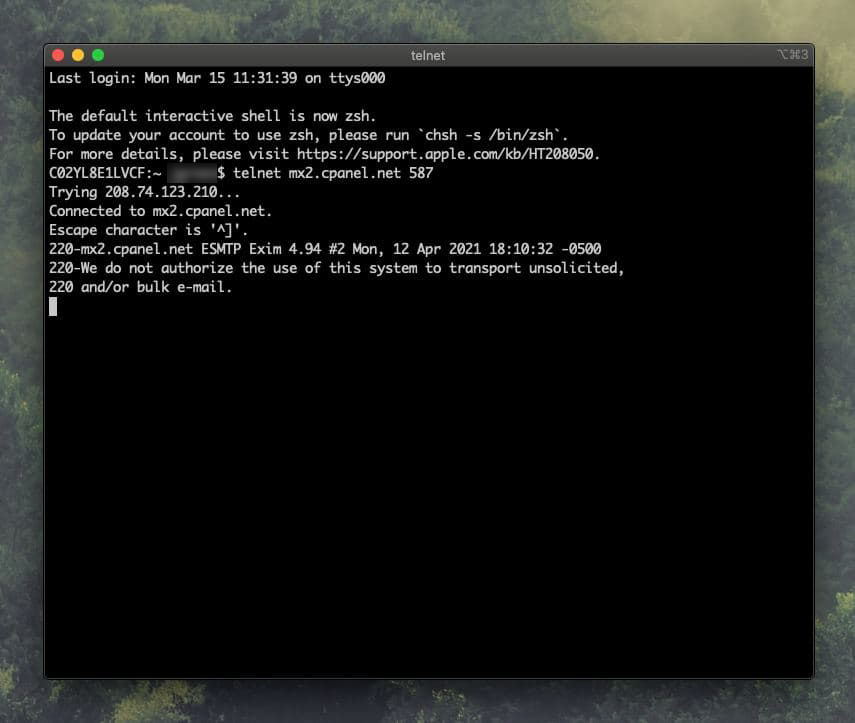
How To Use Telnet On MacOS
Step 1: Use the Spotlight feature to search for Terminal and open it.
Step 2: When Terminal is open, type the following command:
telnet domain.tld port-number
For example, if you are going to use Telnet to connect to an SMTP server on port 25, you would use the following syntax:
telnet zalvis.com 25
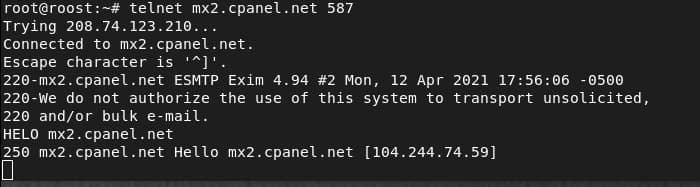
How To Use Telnet On Linux
Step 1: Open your Terminal app.
Step 2: After Terminal opens, type the following command:
telnet domain.tld port-number
For example, if you are going to use Telnet to connect to an SMTP server on port 25, you would use the following syntax:
telnet zalvis.com 25
Common Telnet Ports
587 – Alternative SMTP Port
110 – POP Mail
22 – SSH
143 – IMAP
You can find a list of other ports here.