Customizing your WordPress site can significantly enhance its appearance, functionality, and user experience. While WordPress themes and plugins offer a plethora of options, knowing a bit of CSS (Cascading Style Sheets) can give you the extra edge to make your site stand out. CSS is a stylesheet language used to describe the presentation of a document written in HTML or XML. It controls the layout, colors, fonts, and overall visual aesthetics of your website.
In this comprehensive guide, you will discover 5 super simple CSS codes to customize WordPress site. Enhance your website’s appearance, functionality, and user experience with these easy-to-implement CSS snippets. Whether you are a beginner or have some experience with web design, these CSS snippets will help you achieve a professional look and feel for your site.
Best CSS Codes to Customize WordPress Websites
1. Change Font Styles
Fonts play a crucial role in the readability and overall aesthetic of your website. By changing the font styles, you can make your content more engaging and visually appealing. Here’s a simple CSS code to change the font style of your entire website:
body {
font-family: ‘Arial’, sans-serif;
font-size: 16px;
color: #333333;
}
Explanation:
- font-family: ‘Arial’, sans-serif; sets the font family to Arial. If Arial is not available, it falls back to a generic sans-serif font.
- font-size: 16px; sets the font size to 16 pixels.
- color: #333333; sets the text color to a dark gray shade.
You can replace ‘Arial’ with any other font family you prefer. Google Fonts offers a wide range of free fonts that you can easily integrate into your CSS.
How to Implement:
1. Go to your WordPress Dashboard.
2. Navigate to Appearance > Customize.
3. Click on Additional CSS.
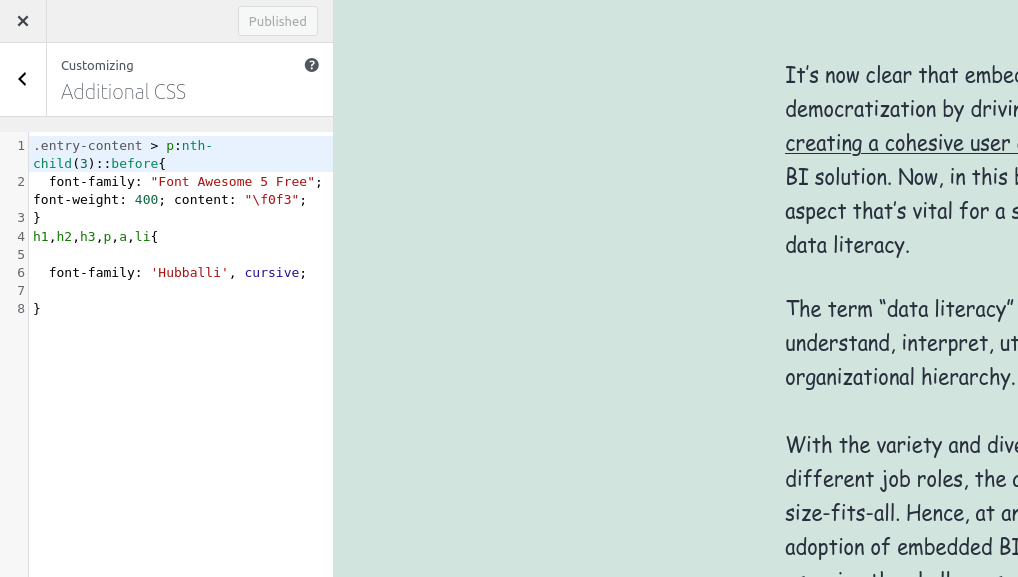 4. Paste the CSS code into the provided field and save your changes.
Scripts here will be saved on your website database after hitting the “Publish” button. You’ll be able to see the changes in your website after you preview it.
2. Customize Link Colors
Links are essential for navigation and user interaction on your website. By customizing the link colors, you can improve the user experience and make your site more visually cohesive with your brand’s color scheme. Here’s a simple CSS code to change the link colors:
a {
color: #1e90ff;
text-decoration: none;
}a:hover {
color: #ff4500;
text-decoration: underline;
}
Explanation:
- a { color: #1e90ff; text-decoration: none; } sets the default link color to Dodger Blue (#1e90ff) and removes the underline.
- a:hover { color: #ff4500; text-decoration: underline; } changes the link color to Orange Red (#ff4500) and adds an underline when the link is hovered over.
How to Implement:
1. Follow the same steps as in the previous section to access the Additional CSS field.
2. Paste the CSS code and save your changes.
3. Adjust Margins and Padding
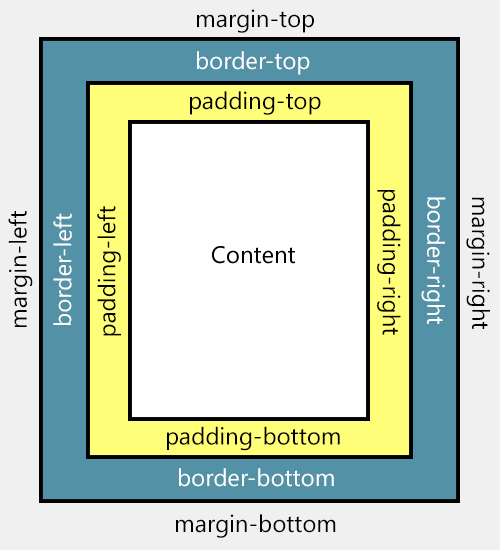
Margins and padding are essential for controlling the spacing between elements on your website. Proper spacing can improve readability and the overall layout of your site. Here’s a simple CSS code to adjust the margins and padding of your website’s content:
body {
margin: 0;
padding: 20px;
}.container {
margin: 0 auto;
padding: 20px;
max-width: 1200px;
}
Explanation:
- body { margin: 0; padding: 20px; } removes the default margin and adds a 20-pixel padding to the body of the website.
- .container { margin: 0 auto; padding: 20px; max-width: 1200px; } centers the container element with automatic left and right margins, adds a 20-pixel padding, and sets the maximum width to 1200 pixels.
How to Implement:
1. Access the Additional CSS field as previously described.
2. Paste the CSS code and save your changes.
4. Style Buttons
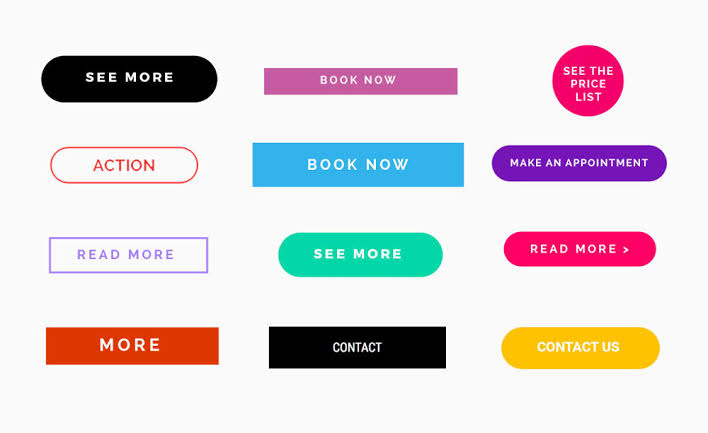
Buttons are crucial for calls to action (CTAs) on your website. Styling your buttons can make them more attractive and encourage user interaction. Here’s a simple CSS code to style your buttons:
button,
input[type=”button”],
input[type=”submit”] {
background-color: #4CAF50;
color: white;
border: none;
padding: 15px 32px;
text-align: center;
text-decoration: none;
display: inline-block;
font-size: 16px;
margin: 4px 2px;
cursor: pointer;
border-radius: 8px;
}button:hover,
input[type=”button”]:hover,
input[type=”submit”]:hover {
background-color: #45a049;
}
Explanation:
- background-color: #4CAF50; sets the background color of the button to a shade of green.
- color: white; sets the text color to white.
- border: none; removes the default border.
- padding: 15px 32px; adds padding to the button.
- text-align: center; centers the text within the button.
- text-decoration: none; removes any text decoration (e.g., underline).
- display: inline-block; ensures the button displays as an inline-block element.
- font-size: 16px; sets the font size to 16 pixels.
- margin: 4px 2px; adds margin around the button.
- cursor: pointer; changes the cursor to a pointer when hovering over the button.
- border-radius: 8px; rounds the corners of the button.
- button:hover { background-color: #45a049; } changes the background color to a darker green when the button is hovered over.
How to Implement:
1. Access the Additional CSS field as previously described.
2. Paste the CSS code and save your changes.
5. Add Custom Backgrounds

Adding custom backgrounds can significantly enhance the visual appeal of your website. You can set a background color, image, or gradient to make your site more attractive. Here’s a simple CSS code to add a custom background:
body {
background-color: #f0f8ff;
background-image: url(‘your-image-url.jpg’);
background-size: cover;
background-position: center;
}
Explanation:
- background-color: #f0f8ff; sets the background color to Alice Blue.
- background-image: url(‘your-image-url.jpg’); sets the background image. Replace ‘your-image-url.jpg’ with the actual URL of your image.
- background-size: cover; ensures the background image covers the entire background area.
- background-position: center; centers the background image.
How to Implement:
1. Access the Additional CSS field as previously described.
2. Paste the CSS code and replace ‘your-image-url.jpg’ with the URL of your desired background image.
3. Save your changes.
Conclusion
Customizing your WordPress site with CSS is a powerful way to enhance its appearance and functionality. The five simple CSS codes provided in this article allow you to change font styles, customize link colors, adjust margins and padding, style buttons, and add custom backgrounds. By implementing these codes, you can create a visually appealing and user-friendly website that stands out from the competition.
Remember to always test your CSS changes on different devices and browsers to ensure compatibility and responsiveness. With a bit of practice and experimentation, you’ll be able to create a unique and professional-looking WordPress site that perfectly aligns with your brand’s identity and goals.
Happy customizing!
If you enjoyed this article, then you’ll love Zalvis's WordPress Hosting platform. Turbocharge your website and get 24/7 support from our veteran team. Our world-class hosting infrastructure focuses on auto-scaling, performance, and security. Let us show you the Zalvis difference! Check out our plans.


